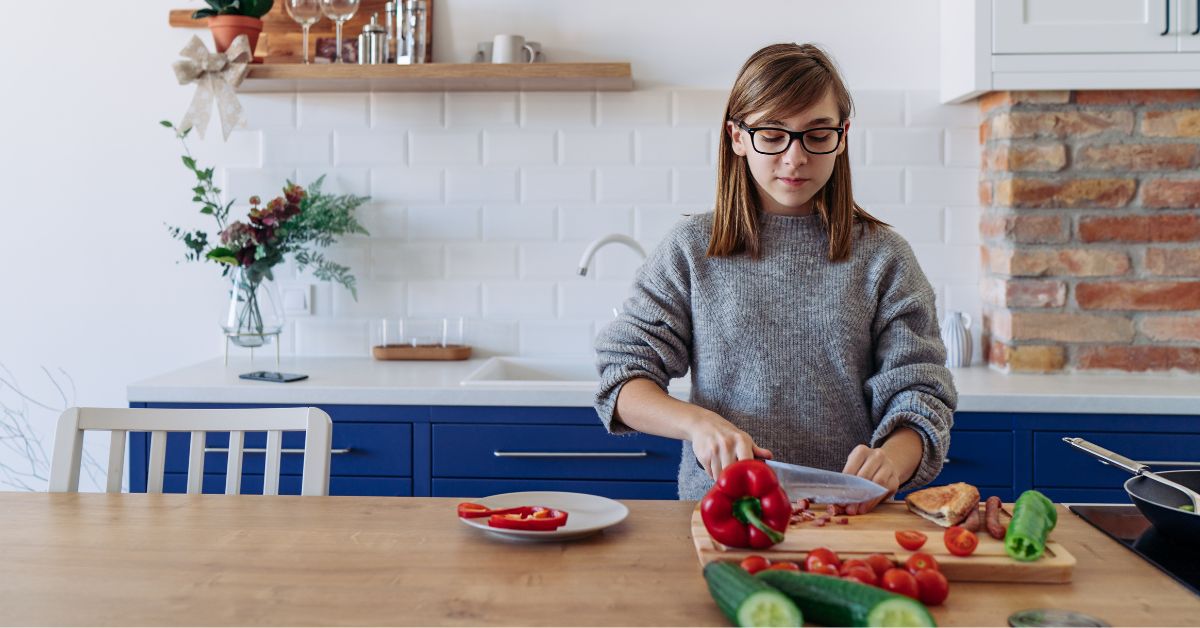
11 Healthy and Easy Dinner Ideas for Teens and Kids – No Complicated Recipes Required!
These eleven dinner ideas for teens and kids will make it easy for them to start cooking, feel more comfortable in the kitchen, and help out at home.
** As an Amazon Associate I earn from qualifying purchases. **
Knowing how to cook – even a little bit – can make a big difference when our kids are living in the world on their own. Cooking at home often saves money and leads to healthier eating.
The first dinners our kids make don’t need to be from complicated recipes. In fact, making a few very easy dinners without recipes can build kids’ confidence in the kitchen and possibly increase their interest in cooking.

The following are eleven healthy and easy dinner ideas your child or teen can start making today that don’t require a recipe:
Quesadillas
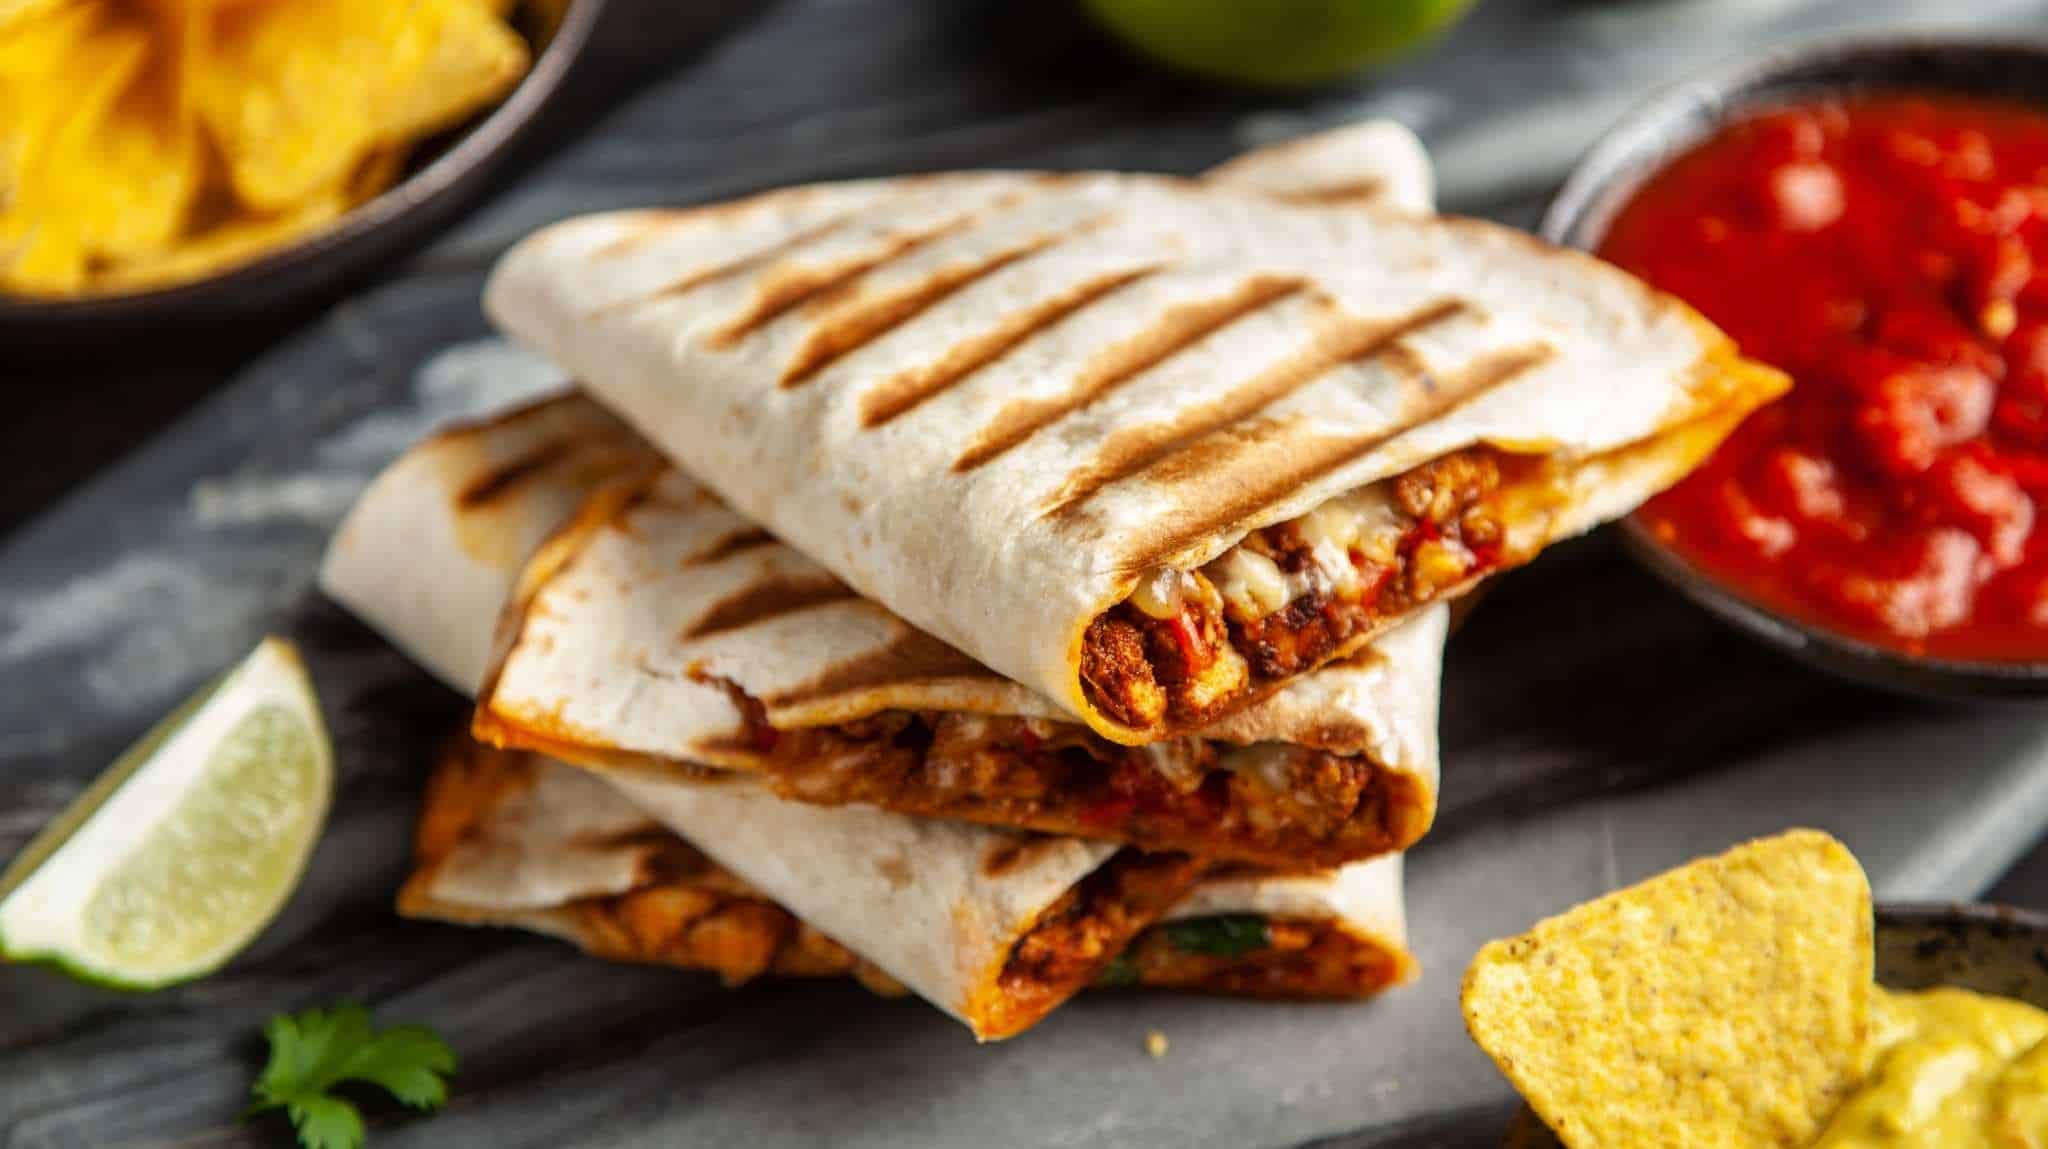
Quesadillas are a perfect easy dinner idea and there are so many ways you can customize for specific tastes or what food is available in your kitchen. They’re easy to make and really only require three ingredients. Here’s what you’ll need:
Skills required:
- Using a stovetop
- Shredding cheese
- (Optional) Using a knife
Required Ingredients:
- Cheddar, Monterey jack, or a Mexican blend cheese
- Wheat or corn/wheat blend tortillas
- Olive oil
Optional Ingredients:
- Chopped baby spinach
- Black or refried beans
- Cooked squash
- Rotisserie or cooked chicken
- Sliced tomatoes
- Salsa
- Sour cream
Here’s how to make them: Place a large frying pan (preferably non-stick) or cast iron pan on your stove and turn on the heat to medium. Heat about a tablespoon or two of oil and lay a tortilla flat on the pan. Put some shredded cheese and whatever else you’re using on top of one half of the tortilla. Using a spatula, flip the empty half of the tortilla on top of the one with fillings. Let the quesadilla cook for two or three minutes, letting the cheese melt, and then carefully flip it over to allow the other side to fry. Beware that as the pan heats up, each quesadilla will likely cook faster so beware of burning. When adequately cooked, use a spatula to take the quesadilla off the pan and onto a plate. Serve with or without salsa and sour cream.
Spaghetti and Meatballs
Spaghetti and meatballs is a hearty dinner idea that just about everyone enjoys. Kids and teens can easily cook this dish as long as they feel comfortable pouring boiling water into a sink to drain the pasta (or an adult can help them do this). Although it’s possible to make marinara sauce and meatballs from scratch, this meal is easier and less time-consuming if pre-made substitutes are used.
Skills required:
- Boiling water
- Draining pasta from boiling water
- Using a stovetop
- Using an oven or microwave
Required Ingredients:
- Pasta, preferably whole wheat
- Jarred marinara sauce
- Frozen meatballs
Read the instructions on the pasta package and the package of meatballs. If heating up the meatballs in the oven, preheat the oven to the correct temperature and place the meatballs on a pan. Place them in the oven when the oven is heated to the right temperature and set a timer for how long they need to cook. If heating up the meatballs by microwave, place them in a microwave-safe dish and heat them for the required amount of time closer to when the pasta is finished cooking.
Next, fill up a large stock pot with the amount of water suggested on the pasta package. Place the pot on the stove, cover it, and turn the stove to high. Once the water is boiling (you’ll see lots of big bubbles in the water), place the pasta in the water and set a timer for how long the pasta needs to cook. Meanwhile, place a colander in your sink.
As the pasta cooks, place some of the marinara sauce in a small pot. Place it on the stove and heat the burner to low. You should not see more than a few small bubbles in the sauce, if the sauce appears to be boiling, turn down the heat.
Once the timer for the pasta goes off, put oven mitts on your hands and carefully (or get the help of an adult) pour the boiling water and pasta into the colander in your sink.
If heating up your meatballs on the stove, take them out when the timer goes off and place the pan on top of the stove or your countertop (place square potholders between the pan and your countertop if the countertop can be damaged by heat).
To serve, place a small amount of pasta on each plate or in each bowl, top it with marinara sauce, and place three to four meatballs on top.
Omelets

Omelets, similar to quesadillas, are an easy dinner idea you can customize based on taste preferences or what you have available in your kitchen. The two somewhat tricky aspects of omelets are making sure the eggs cook enough, but not too much, and flipping the omelet over. Other than that, it’s an easy dish to prepare that requires only a few basic skills.
Skills required:
- Whisking eggs
- Shredding cheese
- Using a stovetop
- (Optional) using a knife
Required Ingredients:
- Many large eggs
- Milk
- Cheddar cheese
- Olive oil
Optional Ingredients:
- Chopped spinach
- Chopped ham
- Thinly sliced onions
- Thinly sliced peppers (preferably green)
- Halved grape tomatoes
- Cubed cream cheese
- Crumbled bacon or ham
Shred cheese and prepare any other optional fillings for your omelet. In a large bowl, crack two eggs for each omelet you plan to make. Add a few tablespoons of milk to the eggs and gently whisk them.
Heat a large non-stick frying pan (about 10 inches wide) on the stove top, heat it to medium, and put a tablespoon of olive oil on the pan. Place the bowl of whisked eggs next to the pan and with a soup ladle, scoop one ladle of eggs and pour it into the center of the pan. With an oven mitt on your hand, carefully tilt the pan so that the egg covers the bottom. Next, sprinkle shredded cheese on top of the egg as well as any toppings. Once the egg seems relatively cooked (it appears to be slightly more solid than liquid), use a spatula to flip one side of the omelet over onto the other side. Let it cook for a few more minutes, turn off the heat, lift the pan (with an oven mitt on), and gently slide it onto a plate. Repeat until you’ve made all your omelets.
Chicken Tikka Masala
Chicken Tikka Masala, a popular Indian dish, sounds fancy but can be really easy to make with a few shortcuts such as jarred sauce.
Skills required:
- Using a stovetop
- Using a knife
Ingredients:
- Jasmine rice (or any white rice)
- 2 pounds of chicken breasts
- Olive oil
- A jar of Tikka Masala sauce
- Lacinato/Dinosaur kale (optional)
Start by cooking the rice by following the instructions on the bag. Or, for a really easy option, purchase frozen rice that can be heated in the microwave.
Next, trim the chicken of any fat or sinew on the chicken that would be difficult to eat and then cut the chicken into bite-size pieces. Heat up a large frying pan or cast iron pan with a tablespoon of olive oil and place the chicken in the pan. Move the chicken around with a wooden spoon until it’s cooked through. At this point, you could remove any liquid that’s accumulated in the pan, although it’s not necessary. Next, add the jar of Tikka Masala sauce to the pan and let it simmer for the amount of time suggested on the jar typically 10-15 minutes).
While the chicken simmers, remove the tough inner stems from the kale, wash and dry it with a salad spinner, and then cut the kale into thin pieces. When the rice and chicken are ready, place a large spoonful of each into large bowls or plates and add a handful of the kale on the side.
Healthy Nachos
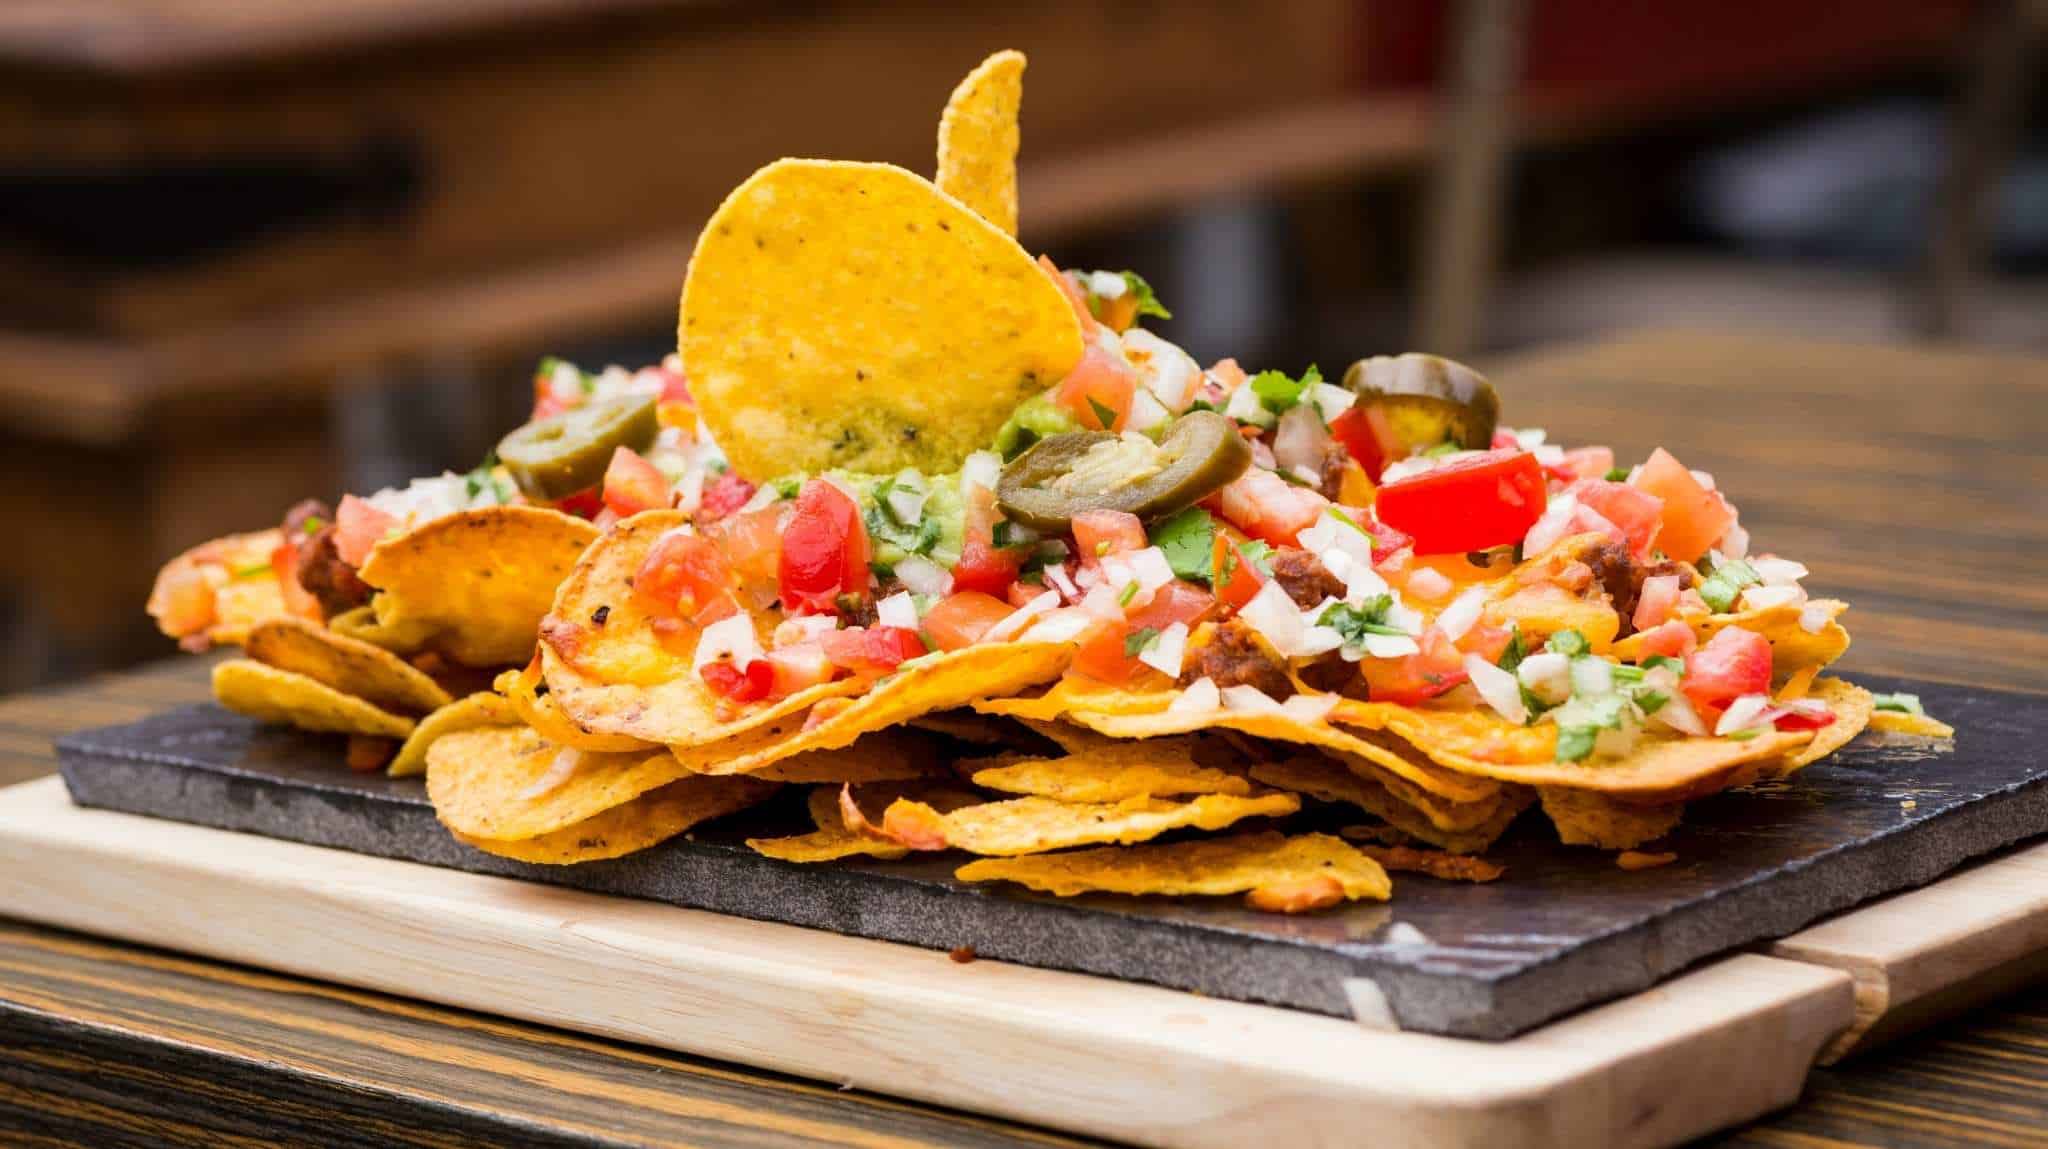
Nachos are the ultimate easy dinner idea that teens and kids can make in just a few minutes. The base of nachos consists of cheese and tortilla chips and can be customized based on your tastes or what you have in your kitchen. Adding vegetables, beans, and/or meats will make your nachos more substantial.
Skills required:
- Using an oven
- Shredding cheese
- Using a can opener (optional)
Required ingredients:
- Tortilla chips
- Shredded Cheddar, Monterey, or Mexican blend cheese
Optional Ingredients:
- Sliced cherry or grape tomatoes
- Jalapeños slices (fresh or pickled)
- Radish slices
- Avocado slices
- Black beans
- Pinto beans
- Cooked and shredded chicken
- Cooked ground beef
- Salsa
- Sour cream
To make nachos, preheat your oven to 425 degrees and line a jelly roll pan or baking sheet with parchment paper or aluminum foil (spray foil with oil for less stick). Spread tortilla chips onto the pan and spread them out in an even layer. Top the tortilla chips with cheese and place them in the oven for 3-5 minutes. If using beans or meat, take the pan out at the three minute mark and sprinkle the meat or beans on top of the chips. Place the pan back into the oven for two more minutes.
When the chips, cheese, and any other topping are ready, remove them from the oven and place them on a trivet or pot holder on the counter. Sprinkle any other toppings on top and then using a spatula, scoop up the nachos and place portions on plates. Salsa and/or sour cream can be served on the side.
Grilled Chicken and a Side
Grilling chicken and serving it with an easy side dish is one of the most simple dinners one can make. If your child doesn’t know how to use a grill, have them broil chicken in the oven instead. Your chicken will taste better if you place it in a marinade first. Side dishes could be a simple salad of lettuce, carrots, and cherry tomatoes, steamed broccoli, or corn on the cob.
Skills required:
- Using a grill
- Using a knife
Required Ingredients:
- Chicken breasts or tenderloins (about 1 ½ pounds for four people)
- Marinade (this McCormick marinade is both tasty and easy)
Take your chicken breasts or tenderloins out of their packaging and with a knife, trim off any fat, or sinew that would be difficult to eat. Place them in a bowl or 8×8 glass pan and pour enough marinade on top to cover (If using the McCormick marinade, mix it first in the bowl and then place the chicken in the bowl). Let the chicken sit in the marinade for however long the bottle or packaging says it should.
Turn on your grill and let it heat up for about 5 minutes. Place the chicken on the grill. If using chicken breasts, let them stay on the grill for about 5 minutes before using tongs to flip them over. Tenderloins should be flipped in about 2 minutes. After flipping the chicken over and waiting 5 more minutes (less for tenderloins), use the tip of the tong to press down on the chicken. If it feels firm, the chicken should be done. If you’re unsure, take the thickest piece of chicken off the grill, place it on a cutting board, and slice into it. If you see pink, it’s not done and needs to continue cooking. When the chicken is done, use tongs to take it off the grill and place it on plates.
Prepare your side dish while your chicken cooks. One of the easiest side dishes is to simply combine lettuce, peeled and sliced carrots, and halved grape tomatoes in bowls and top with bottled dressing.
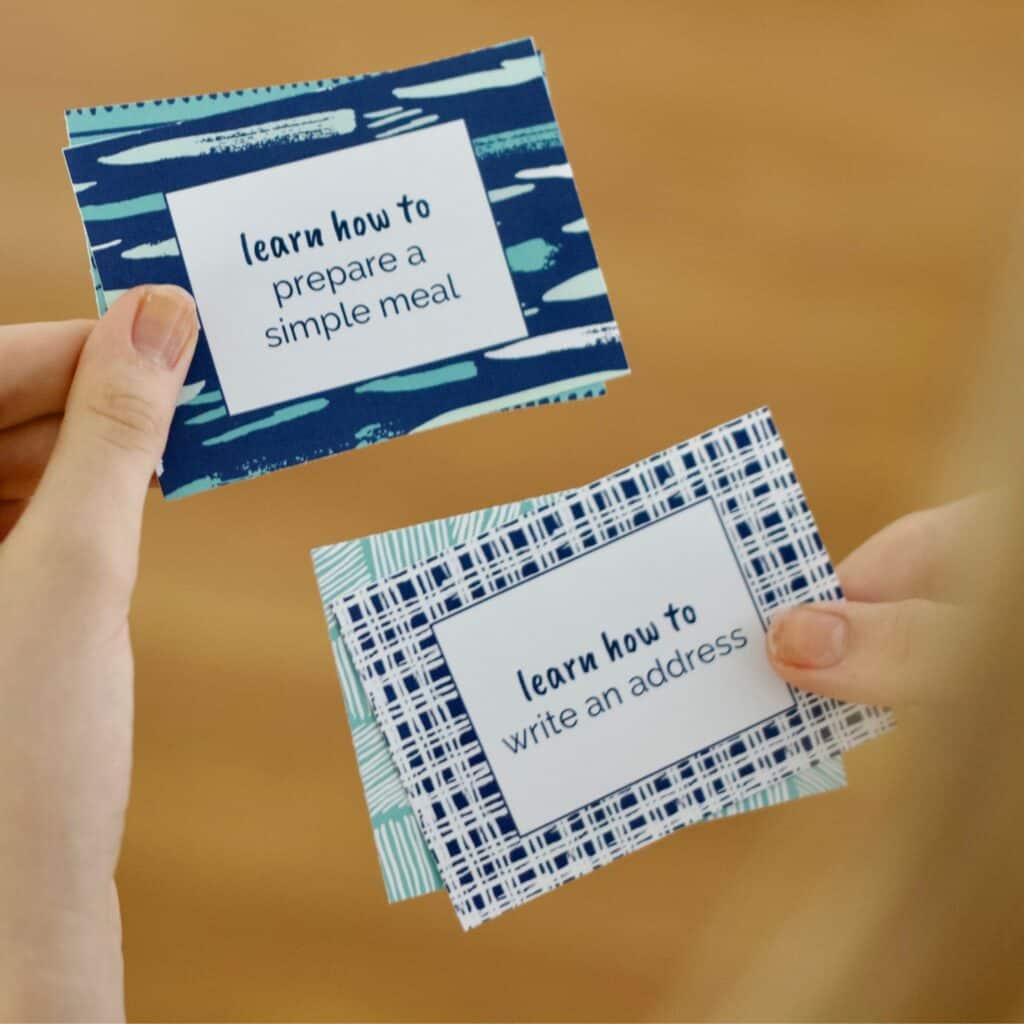
Ready to teach your child life skills? These cards can help! Each card in this eighty-one deck contains a skill your child can begin practicing with you or on their own. Click here or the image below to learn more.
Hamburgers and a Side

Just like chicken, grilling burgers are easy to make – as long as you know how to use a grill. And burgers can be customized to each individual’s taste based on the topping and condiments added. Easy side dishes include: a simple salad of lettuce, carrots, and cherry tomatoes, heating up frozen sweet potato fries, or simply peeling and cutting carrot sticks.
Skills required:
- Using a grill
- Using a knife (optional)
Required Ingredients:
- Ground beef (about 1 ½ pounds for four people)
- Olive oil
Optional Ingredients:
- Hamburger buns
- Sliced cheese
- Ketchup
- Mustard
- Relish
Take the ground beef out of its packaging and with your (clean!) hands, shape the meat into four or five round patties. Place a bit of olive oil in your hands and rub it onto the patties (alternatively, you can put the olive oil on a paper towel and rub the grates of the grill with it.)
Turn on your grill and let it heat up for about five minutes. Once the grill is hot, carefully place the patties on the grill. Let them cook for about 5 minutes on each side. When the ten minutes is up, use the head of a spatula to press on the burger. If the burger feels very firm it’s well done (thoroughly cooked with no red meat). If it’s slightly soft, it’s medium rare to rare. Take the burgers off depending on your preference. What you don’t want to see inside your burger is raw meat. If you find raw meat in your burger, place it back on the grill to cook a few minutes longer. When the burgers are done, place buns on plates (if you’re using buns) and then place the burgers onto the buns then add condiments like cheese, ketchup, mustard, and relish, depending on preference.
Prepare your side dish while the burgers are on the grill. One of the easiest side dishes is to simply combine lettuce, peeled and sliced carrots, and halved grape tomatoes in bowls and top with bottled dressing. Also, heating up frozen sweet potato fries in the oven is a good complement to burgers.
Big Salad
Making a big salad is an easy way to make a healthy dinner that can be tailored to everyone’s tastes. The options with salads are nearly endless and can allow you to make use of any leftover food you have in your kitchen. While no ingredients are “required” in salads, you will want to think about what you’ll be using as a base, which in most salads is lettuce or other greens. Since you’re making a salad for dinner, it’s probably a good idea to add a protein and possibly a grain to make it hearty.
Skills required:
- Using a knife
- Using a stovetop (optional)
- Using the oven (optional)
Here are a few suggested ingredients to include in your salad:
- Lettuce
- Kale
- Spinach
- Cherry or grape tomatoes
- Carrots
- Snap peas
- Radishes
- Cucumbers
- Red onion (thinly sliced)
- Scallions
- Broccoli
- Quinoa
- Rice (white or brown)
- Cheese
- Cooked chicken
- Hard boiled eggs
When preparing your salad, think about which flavors work best together. Also, vegetables like carrots, tomatoes, snap peas, radishes, cucumber, broccoli, and scallions will all need to be cut into bite-size pieces. If you’re using onions, it’s best to cut them into very thin slices – few people like eating big chunks of onions. And, of course, quinoa and rice should be cooked before being served.
You’ll want a dressing for your salad too and again, here the options are endless. Our family enjoys this Green Goddess dressing recipe.
Grilled Cheese and Tomato Soup
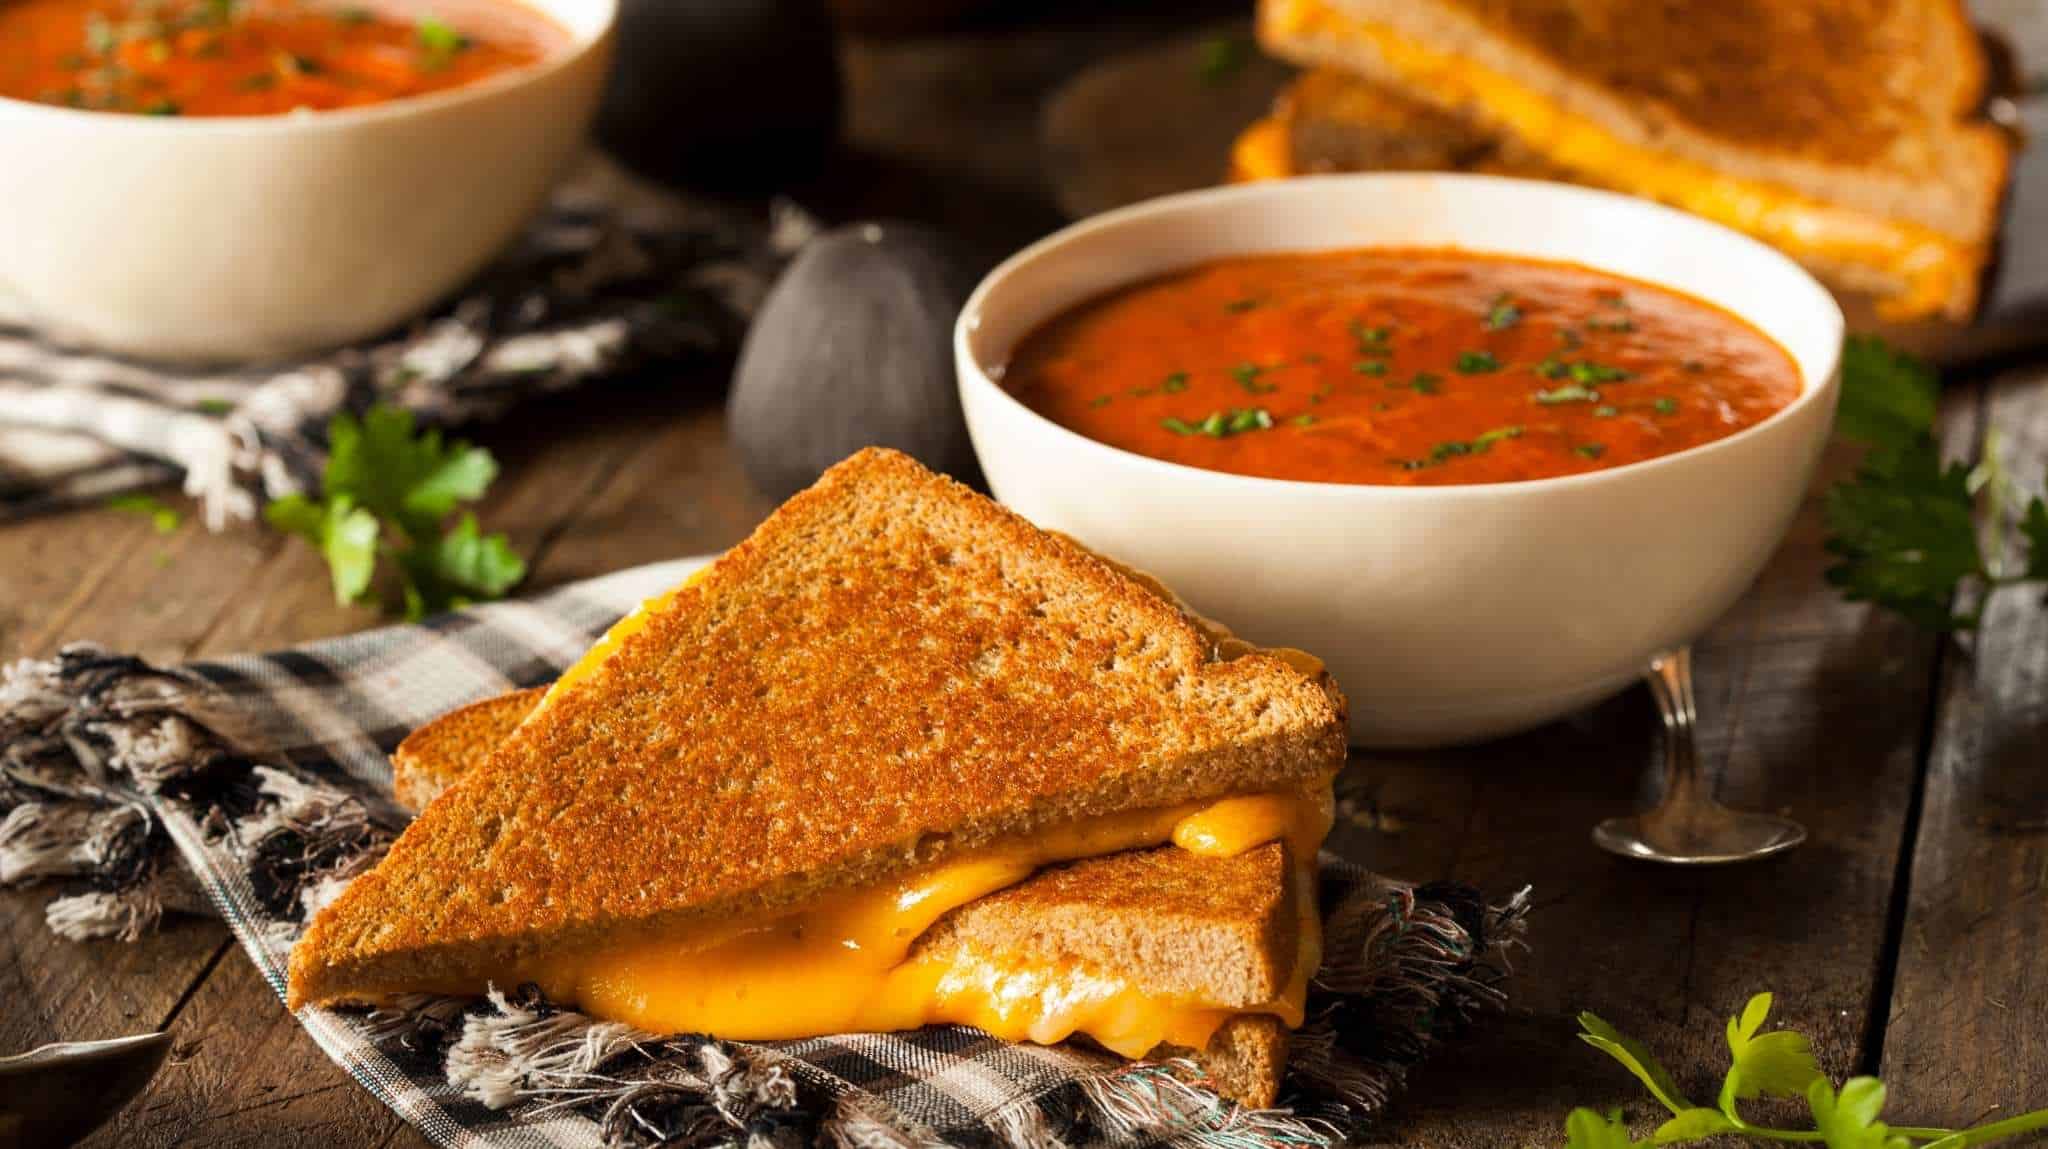
Grilled cheese and tomato soup is the ultimate comfort food and making it can be as easy or complex as you want to make it. A very easy version would consist of heating up a can of soup and grilling bread and cheese with pre-cut slices. If you’re up for more complexity, this easy tomato soup recipe is a family favorite.
Skills required:
- Using a knife
- Using a stovetop (optional)
- Using a microwave (optional)
Here’s what you’ll need for an easy version:
- Can or box of tomato soup (enough to feed your family)
- Slices of bread
- Cheddar cheese
- Butter or butter substitute
To make the grilled cheese, place a non-stick pan on your stove top or, if you have one, heat up a panini press. Butter two sides of bread with butter or butter substitute and place slices of cheese between the two pieces of bread on the sides that aren’t buttered. Heat up your pan to medium and place the bread and cheese sandwich on it. Let it sit for approximately four minutes, allowing the cheese to melt but the bread not to burn. Flip and repeat with the other side. Cook your remaining sandwiches the same way.
While the grilled cheese is being made, follow the directions on your tomato soup can and heat up the soup accordingly, either on the stovetop or microwave.
Serve the soup in bowls and the grilled cheese on plates.
Breakfast for Dinner
Having breakfast for dinner can be a fun treat every now and then. And although many breakfast foods are loaded with sugar, it’s possible to make them healthy! You can mix and match different foods depending on what’s available in your house or just what you like to eat.
Skills required:
- Using a stovetop
- Using a knife (optional)
- Using a blender (optional)
Here are a few options:
- Scrambled or fried eggs
- Toast or English muffins
- Muffins
- Whole wheat or multigrain pancakes or waffles
- Sausage
- Bacon
- Hash browns or roasted potatoes
- Smoothie
- Juice
- Chopped fruit salad
Making breakfast for dinner is easier if you purchase muffins rather than make them (although homemade muffins are definitely tastier!) and use a pancake or waffle mix rather than making them from scratch. Bacon can be tricky to make because its grease can splatter but cooking it in the oven is a safer and slightly easier option. Smoothies can be made with yogurt, juice, and fruit but there are numerous variations of smoothies to choose from. A well-balanced breakfast will have a carbohydrate, protein, and something fruity.
Homemade Pizza
Everyone loves pizza and there are many different ways to make it. You can use premade pizza dough and add whatever toppings you prefer or are available in your kitchen. Here’s what you’ll need to easily make a homemade pizza:
Skills required:
- Using an oven
- Using a knife (optional)
- Shredding cheese (optional)
Required Ingredients:
- Premade pizza dough or a pizza crust
- Tomato sauce or pizza sauce
- Mozzarella cheese
Optional Ingredients:
- Pepperoni
- Cooked sausage crumbles
- Bite-sized slices of ham
- Thin slices of green pepper
- Thin slices of onion
- Sliced black olives
Heat your oven to the temperature recommended on the pizza dough package or pizza crust package. Roll out your pizza dough (if using) on a floured surface and then place it on an oiled baking sheet. Spread enough tomato sauce or pizza sauce on the dough so there’s a thin layer on top, but don’t use too much or your pizza could be soggy. Place any toppings on top of the sauce and then cover with shredded cheese (using pre-shredded cheese would make this even easier). Once the oven is heated, place the pan in the oven and bake for the recommended time on your pizza dough or pizza crust packaging. When done, remove from the oven and carefully cut the pizza into slices (you may want to transfer the pizza to a cutting board first). Serve pizza on plates.
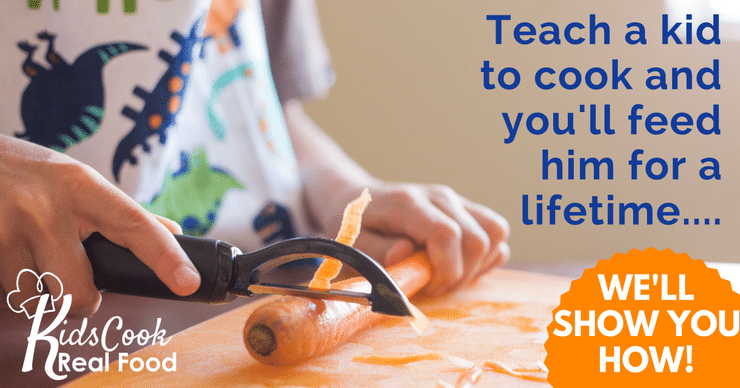
Ready for your child to learn cooking skills? The Kids Cook Real Food online courses can help! The program contains eight self-paced courses separated by ages and ability. Intermediate courses teach kids sharp knives and stovetop safety, and the advanced level gets kids comfortable using small appliances and making more advanced dishes (like bechamel sauce). Since the courses are self-paced, kids can skip skills they’ve already mastered. Click here to learn more and sign up.
See related:
Teach Kids to Cook by Age and Ability
24 Basic Table Manners all Kids Need to Learn
What to do next…
1. Subscribe to Self-Sufficient Kids’ email list.
Like what you read here and want to learn more? Every Thursday I’ll send you one parenting tip about raising self-sufficient kids and creating the peaceful relationship you yearn to have with your child. Click here to sign up.
2. Take one of my quizzes!
Find out if you’re raising a self-sufficient kid (click here) or if you’re doing too much for your kids (click here). At the end of each quiz, you’ll be asked to provide your email address to see the results.
3. Get your kids started on chores.
Learn how to get your child started on chores (& keep them motivated + avoid power struggles) by enrolling in my Get Your Kids Successfully Started on Chores course. Click here to learn more and sign up.

About Kerry Flatley
Hi! I’m Kerry, the mother of two girls and a certified parent educator. I believe it is possible for parents to have a supportive, loving, and warm relationship with their kids while raising them to be independent and ultimately self-sufficient. Over the years, I’ve read numerous books and articles that support this belief and I’ve put these ideas into practice with my own kids. Read more about me and Self-Sufficient Kids here.